How to import SRT subtitles into
Final Cut Pro as titles
Open the SRT in Subtitle Wrangler, fix its timing on the waveform if needed, export it as an .fcpxml at your project’s frame rate, then use File ▸ Import ▸ XML… in Final Cut Pro. Every subtitle arrives as a title you can style and animate. A plain-text script works too: each line becomes a subtitle, and Subtitle Wrangler times it to your audio.

Steps
-
Open your SRT file
In Subtitle Wrangler, click Start New, then Import a file and pick your .srt. VTT, ITT and ASS open the same way. Starting from a .txt or pasted script? It needs timing first — see the script guide.

-
Fix the timing against the waveform
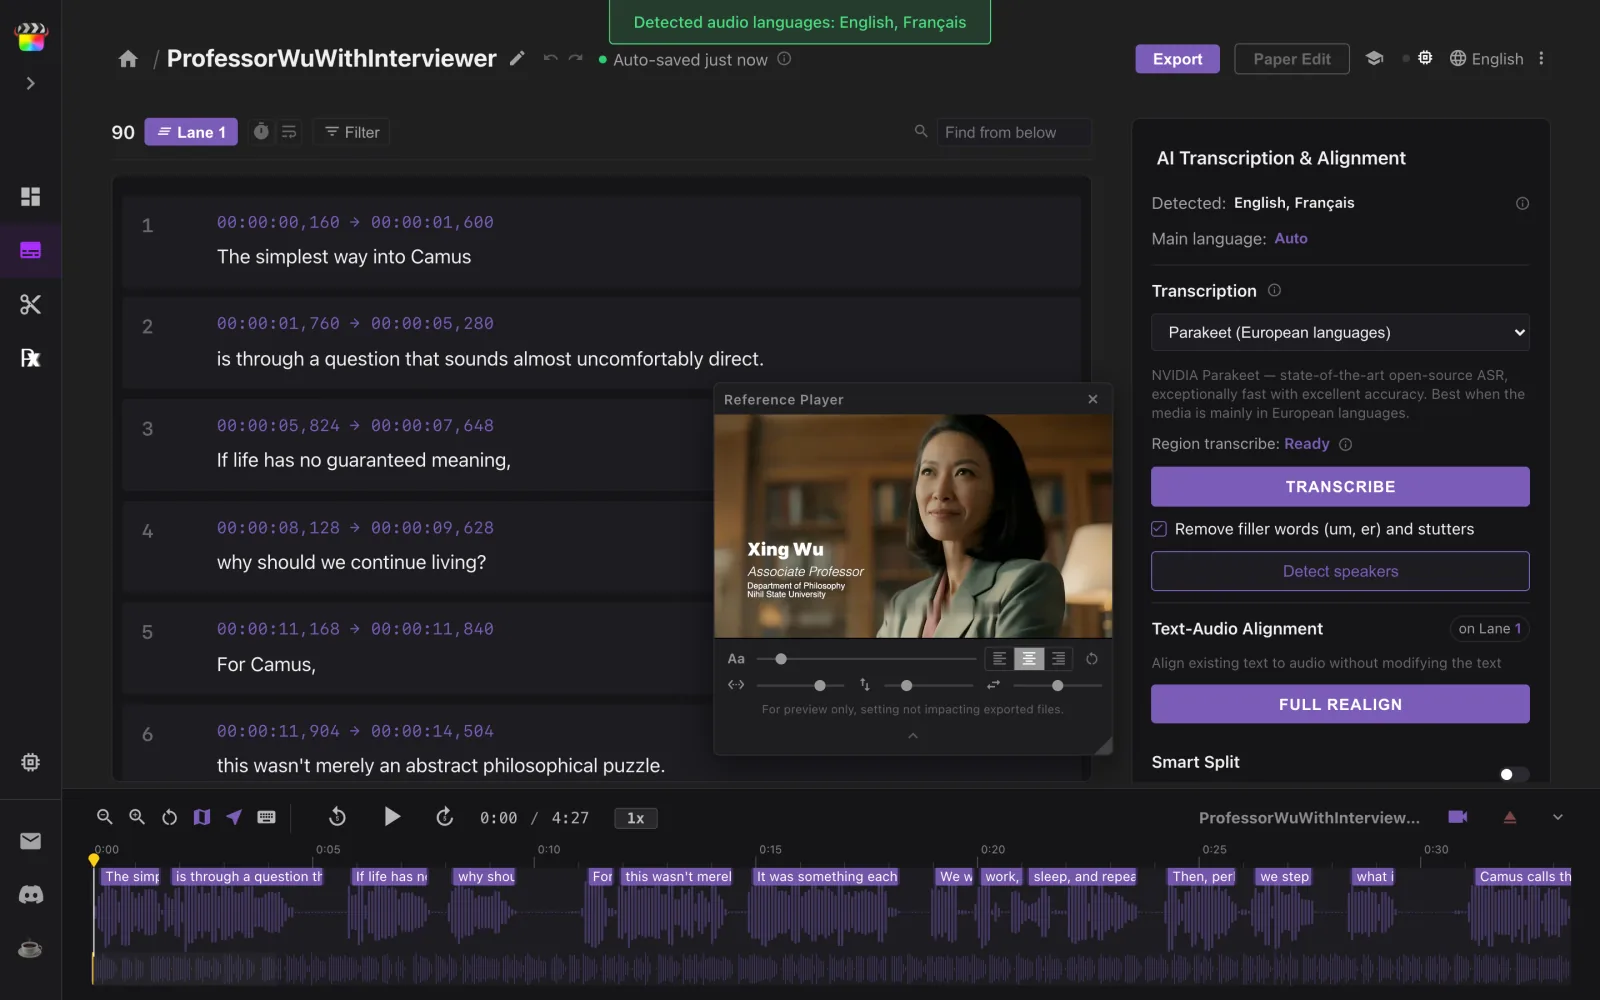
Click Load Media and add your video or audio. Every subtitle sits on the waveform: drag an edge to retime it, press B and click a word to split there, ⌘J to join, ⇧B to join and re-split. Subtitle Wrangler is built for this step — fix sync here, before Final Cut Pro.
-
Use your own title style (optional)
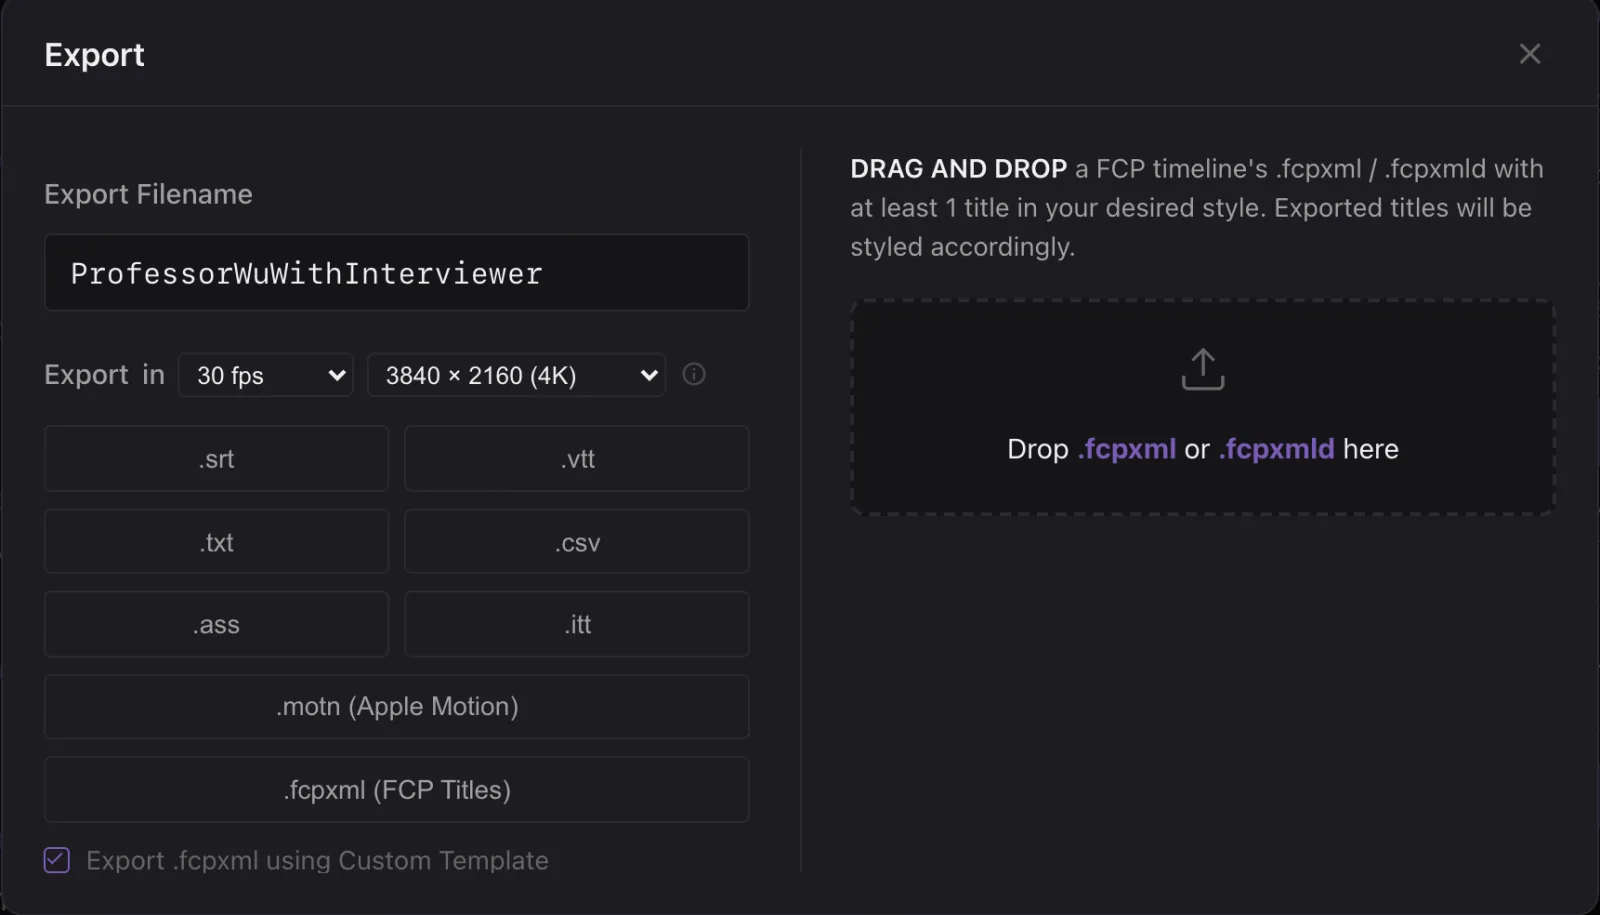
In Final Cut Pro, style one title the way you want and export that timeline as XML. In Subtitle Wrangler’s Export window, tick Export .fcpxml using Custom Template and drop that file in. Every subtitle will copy that title’s template, font and settings. Third-party titles work too, and Subtitle Wrangler keeps the template for next time.
-
Export as FCPXML
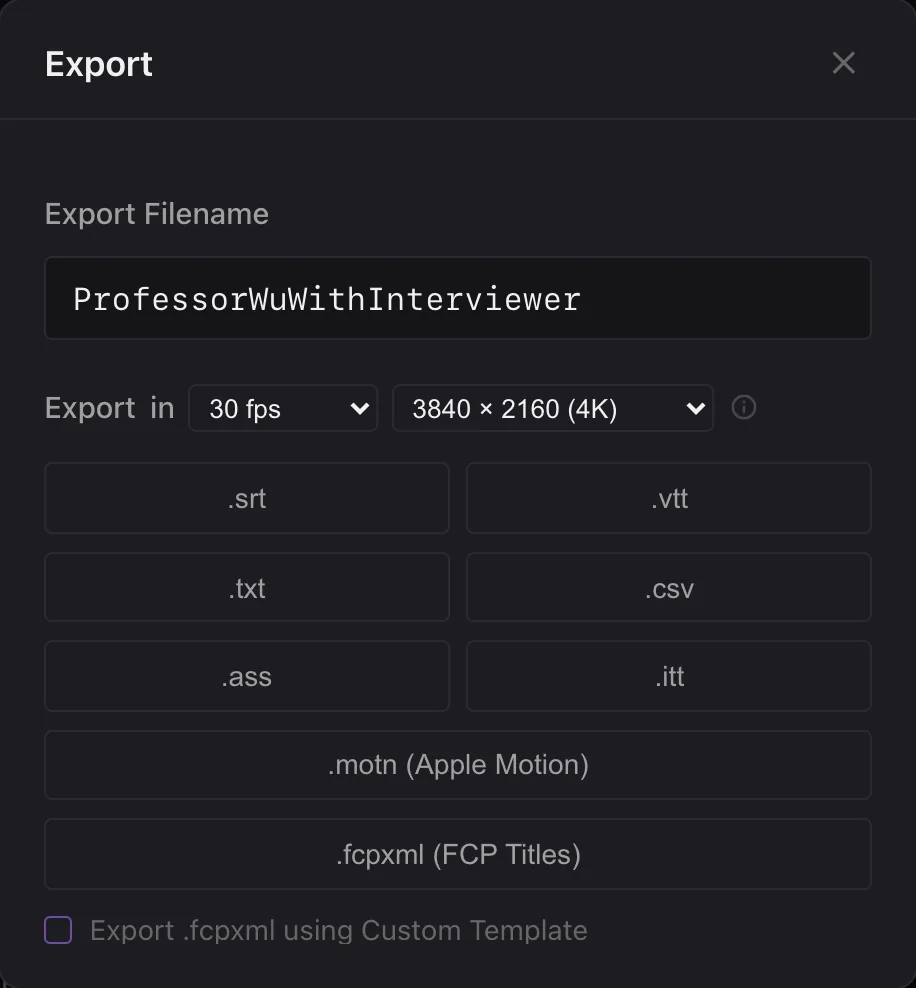
Click Export. Set the frame rate and frame size to match your Final Cut Pro project (4K, 1080p, vertical or square), then click .fcpxml (FCP Titles).
-
Import into Final Cut Pro
Choose the .fcpxml and the library to import into — double-clicking the file opens the same dialog. The titles arrive in a new project named after your file, in an event called Imported Subtitles. Copy them from there into your edit.
Good to know
Which frame rate should I pick?
The one your Final Cut Pro project uses — Subtitle Wrangler preselects your video’s rate when one is loaded. It offers 23.976, 24, 25, 29.97, 30, 50, 59.94 and 60 fps. SRT counts time in milliseconds and FCPXML in frames, so a subtitle can shift by up to one frame.
What do the titles look like by default?
Basic Title: Helvetica 48, white with a black outline, centered near the bottom of the frame. For any other look, use a custom template (step 3).
Can’t Final Cut Pro do this by itself?
Since version 12.3, Final Cut Pro can import an SRT as captions and convert them to titles. Subtitle Wrangler is still the quicker route, and it lets you fix timing on the waveform first, use any title style (third-party included), and bring in several languages at once.
Can I bring in several languages at once?
Yes. Put each language on its own lane and export All Lanes. Each lane becomes its own storyline in Final Cut Pro, stacked in the timeline.
Can I fix the timing before it goes into Final Cut Pro?
Yes — that is what Subtitle Wrangler is for. Load your video, then drag cue edges on the waveform, press B to split at any word, ⌘J to join. Quicker than moving titles one by one in Final Cut Pro.
Which formats can I import?
SRT, VTT, ITT, ASS and FCPXML come in with their timings. A .txt file, or text you paste with Paste Text In, becomes one subtitle per line; load your audio and click Full Realign to time every line to the speech.